Welcome!
Introduction
If you don’t have a MyAIMStore website yet…
Quick Start
Site Options
Home Page Options
Your MyAIMStore In-Depth
Dashboard Overview
Customizing Your Site’s Appearance
Themes
Customize
Site Identity
Colors
Background Image
Menus
Widgets
Customizing Your Site’s Settings
General Settings
Writing
Reading
Discussion
Media
Permalinks
Akismet Anti-Spam
Customizing Your Site’s Options
General Options
Main Header
Main Footer
Member Info
How-To, FAQ & Troubleshooting
How do I change my contact information?
How do I change my location?
How do I change my site name?
How do I change the main menu?
How do I update the home page slider area (Hero Section)?
How do I update the home page product section?
How do I update the home page about section?
How do I update the home page Blog section?
How do I update the home page Call to Action section?
How do I update the home page Sign Up section?
How do I update the home page Video section?
Understanding Advanced Options & Settings
Widgets
Page Templates
Custom Page Template List
Setting up Page Templates
Adding an external URL to your page navigation menu
Understanding SEO
Understanding Meta Information
Archive Indexing
Keyword Meta
Adding Meta Information and SEO to your pages and posts
Additional Information
Theme Documentation
(Last Updated 5/2022)
Welcome to the new MyAIM Store 4.0 Theme!
Introduction
So you’ve started your MyAIMStore website and can’t wait to get it up and running? Well, you’ve come to the right place!
We’ve spent a lot of time bringing you the best theme which combines a fresh new look with plenty of easy-to-use customization options.
As a member and part of the AIM team, we want you to have all of the tools to build your own AIM community. Having a website that tells your story is a huge part of that, so we hope you’ll take the time to customize your website and make it truly your own.
The MyAIMStore Support team has done the dirty work for you in getting your site primed and ready for you to enjoy. Out of the box, we’ve set up the site to load fast and look good on mobile phones, tablets, and desktops. Your site has already been set up to include testimony pages, embedded videos, featured products, affiliate links, and other default content. You’ll be able to update content throughout your site, pull in video and social media, attach to your MailChimp distribution list, and more.
Personalizing a site, however, is what really makes it special. Follow along with us as we take you step-by-step through optimizing, customizing, and finishing a MyAIMStore site which is very truly yours.
We’ve tried to include as much as we can here, but please contact us with any questions!
If you don’t have a MyAIMStore Website yet…
If you’re an AIM member and you don’t already have a “My AIM Store” website, contact us and we’ll set one up for you! Your new site will reside at https://myaimstore.com/your-store-name with your member information, and any products purchased through your site will use your member number, so you’ll get credit.
Quick Start
You’ll need to make a few minimal adjustments to your site to get it personalized. Here’s what you need to do! If you want to do more, continue with the more detailed documentation below.
- Update the Options section with your member information.
- Update the Home Page options.
- Start writing!
Sound easy enough? Let’s start with your options.
Options
- Click on the “Options” button on your left-side menu.
- Beneath the “How To’s” section, you’ll find the Options. Navigate to Member Info Options and enter your desired details, such as your name, phone number, a short About Me blurb, and email address.
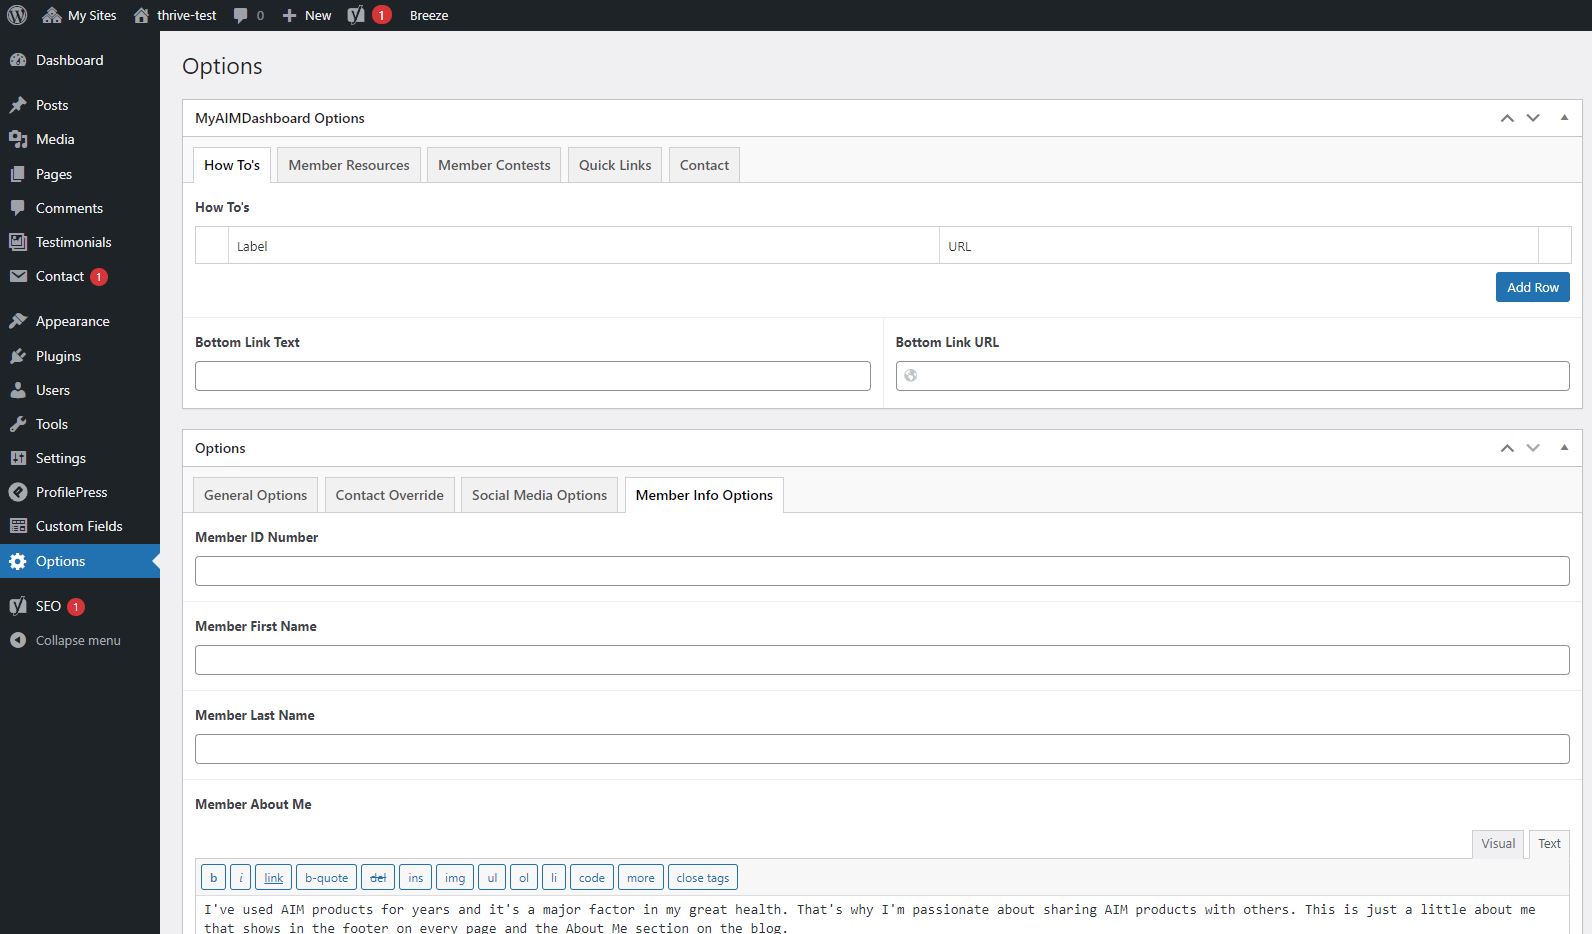
Member Info Options tab. Click to expand.

Member Info Options tab. Click to expand.
3. Next, you may also fill out your physical address along with a map location. This will appear on the contact page, as well as the footer
Done! Next, let’s update our Home Page Settings.
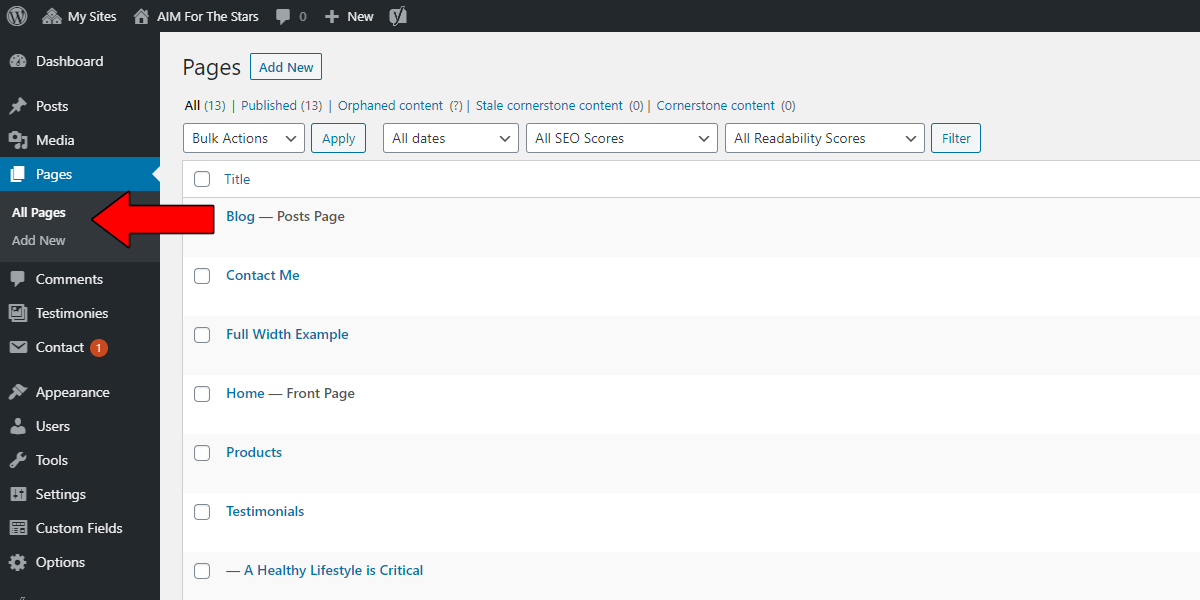
- On the left-side menu, click “Pages”, then “All Pages.”
- Click “Edit” on the page titled “Home.”
- Scroll down to the “Home Page” section and expand the “Home” tab.
- Fill out and customize these fields as desired. If you wish to upload a new background image, please use one which is at least 1200px wide. Optimal size for this area is 1920px wide by 660px tall.

Changing your home page settings. Click to expand.
That’s really all you need to do in order to get started!
If you would like to do even more customization to your MyAIMStore, work through our tutorials below. If not, happy writing!
Your MyAIMStore In-Depth
After we set up your MyAIM Store (MAS) website, we’ll send you an email with your login information. Login to your site by visiting https://myaimstore.com/your-store-name-here/wp-admin/ .
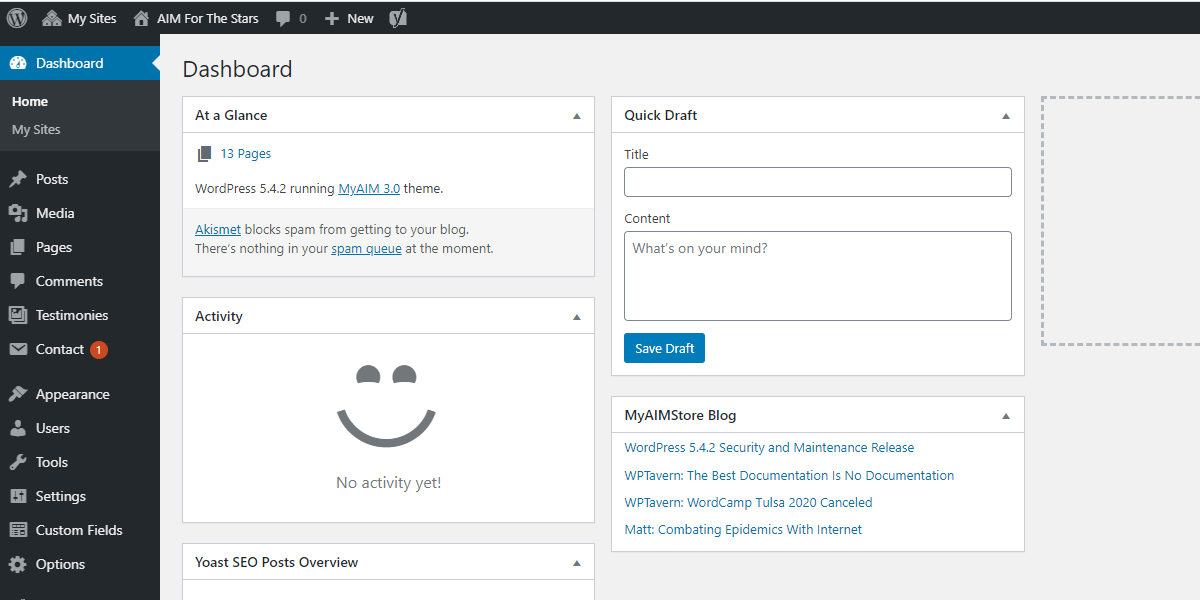
Dashboard Overview
Once you log in, you’ll see your website dashboard, and a menu of customization options on the left. Here is a quick introduction to your customization options. Let’s start at the top! (Click on the links for screen shots.)
-
- Dashboard. The dashboard is an informational overview for your site. You will likely not need to use this very often.
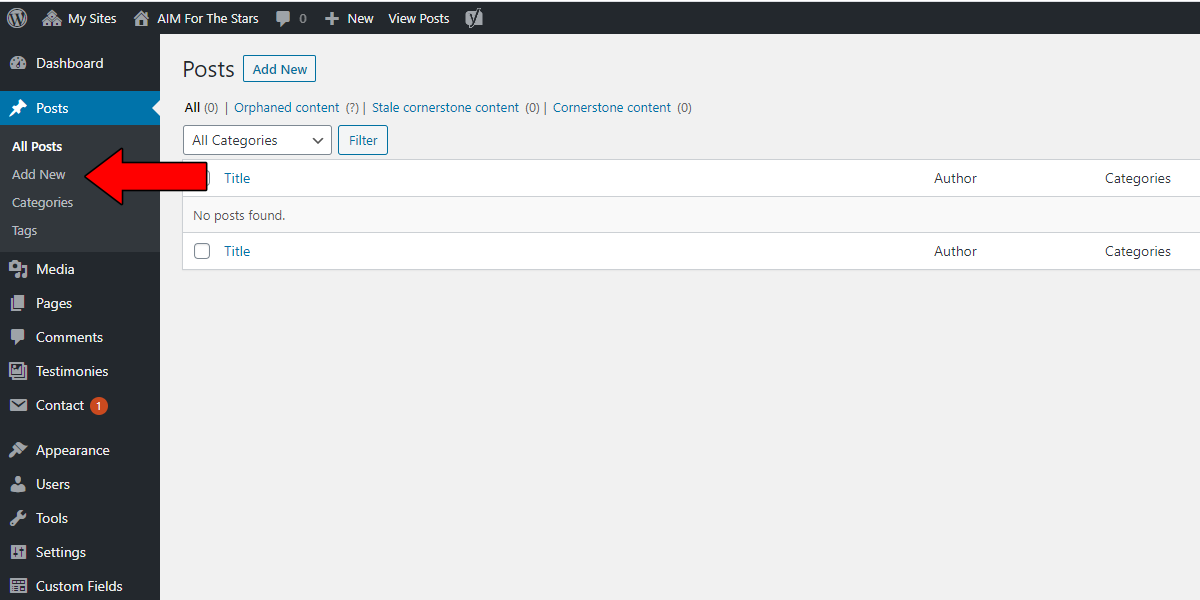
- Posts. Here is where you can create your own blog, instead of using our BarleyLife blog. To add a new post, click “Add New” under the Posts menu option. If you choose to do this, make sure to update the Menu to point to “/blog/” instead of “https://thebarleylifeblog.com/”
- Media. This is the library of images used on your site. You can add additional images directly to this page, or click “Add Media” at the top left of any blog post or page to add to your post.
- Pages. These are the pages which make up the content of your blog that doesn’t change much. It is completely optional to add new pages or to edit the default pages which came with your new MyAIMStore site.
- Comments. Here is where you can manage the comments that users leave on your site, whether on pages, blog posts, or elsewhere.
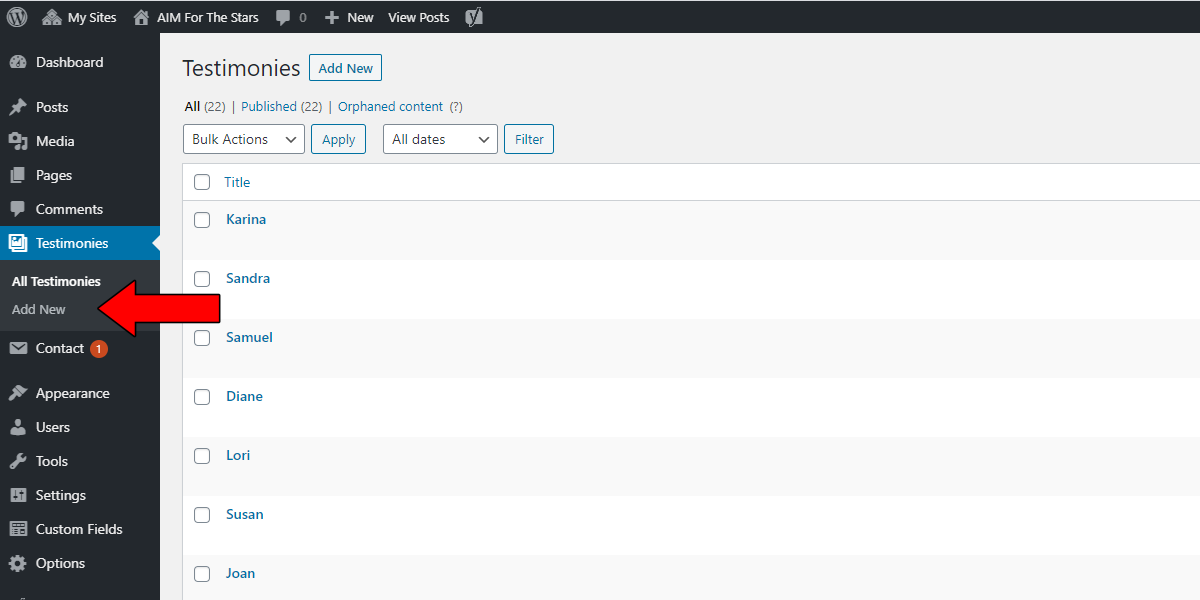
- Testimonies. Your MyAIMStore site comes pre-loaded with some great testimonials, but as you build a clientele who loves your products, you can add their positive feedback here!
- Contact. Here is where you can create custom contact forms, for users to be able to contact you. Don’t worry, your users can already simply click your email address on the top right of your site, or “Contact” in the main menu. You likely will not need to use this feature.
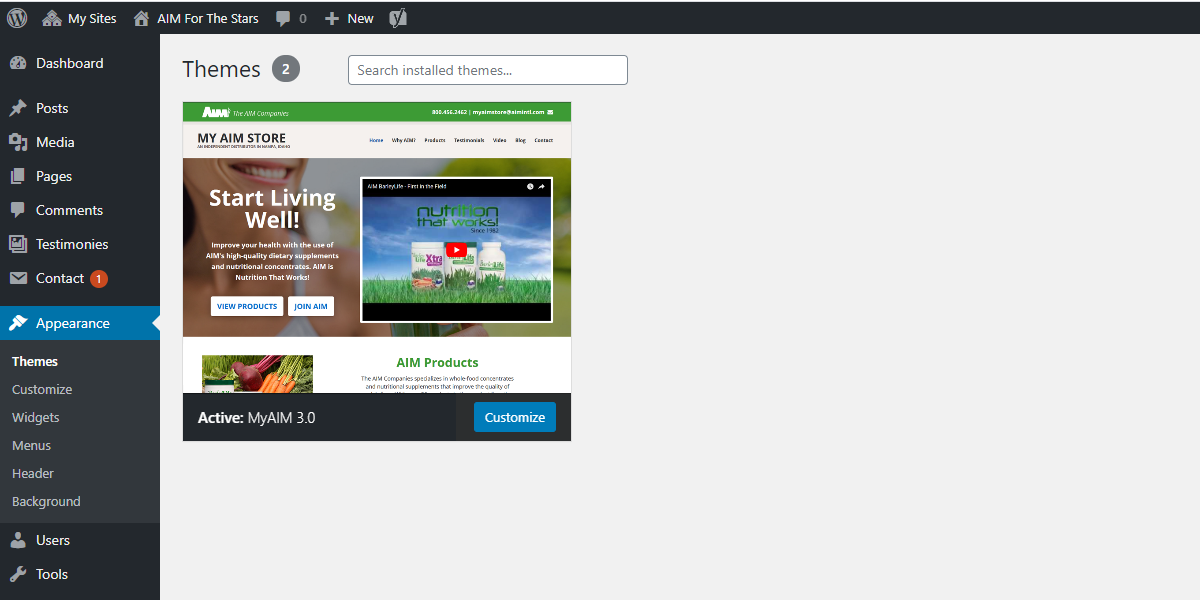
- Appearance. Here is where you can customize many features of your site, including colors, wording, and more. We will get into this in more detail below.
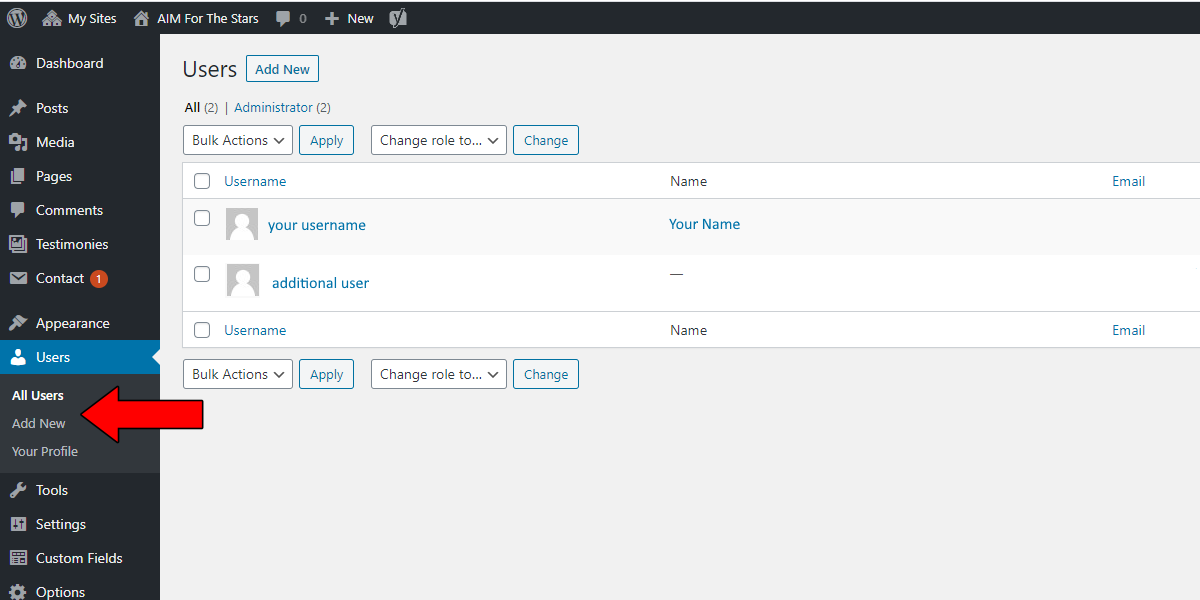
- Users. Here is where you can add additional users to your site. For example, if you have writers who are contributing regular blog posts about your products, you can add them here. You will find yourself in this list as the Administrator.
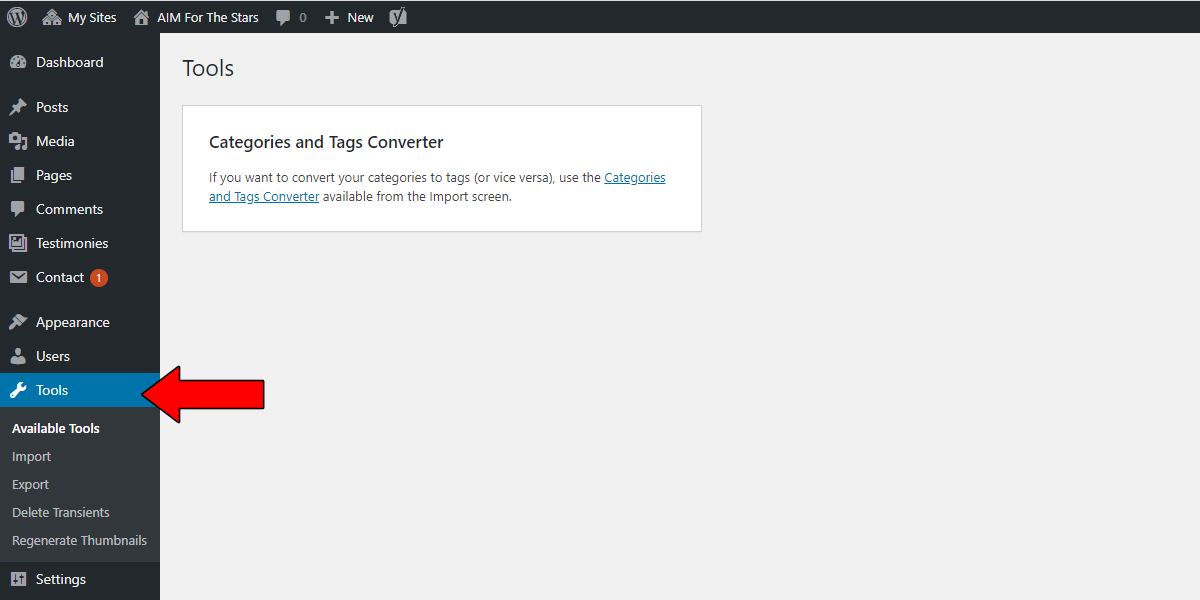
- Tools. Here are a few tools that you’ll likely never need to use. But isn’t it nice to know they’re there? WordPress-savvier users may wish to import blog posts from another site they own, for example.
- Settings. Here is where you can customize a few settings for your website. Don’t worry, we’ve set you up with the defaults. We will get into this in more detail below, too.
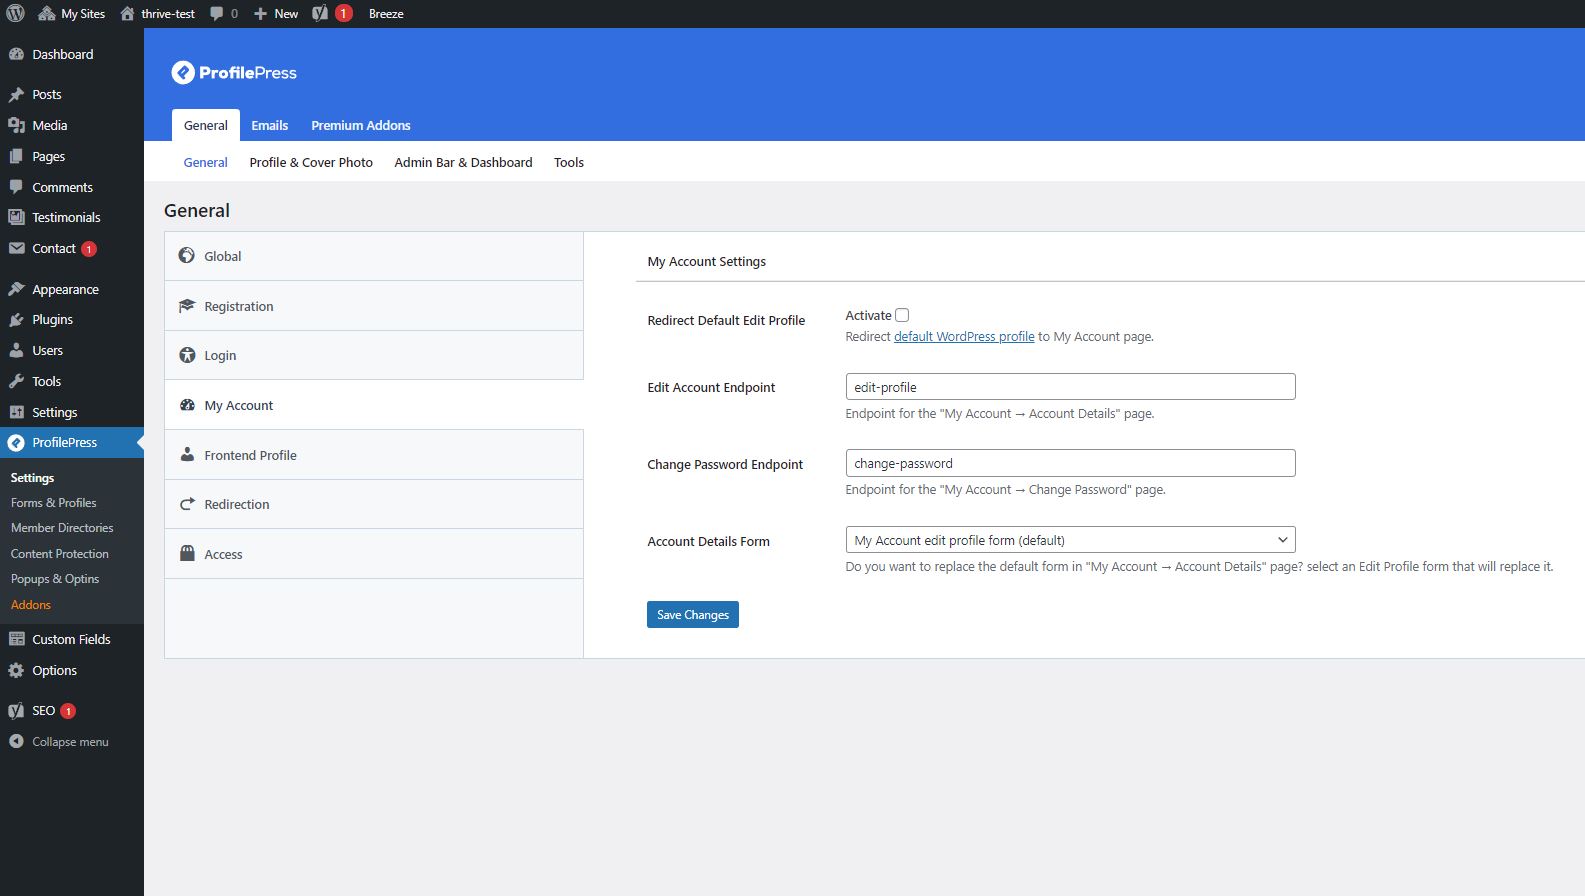
- ProfilePress. These optional settings determine how avatars for users and commenters on your site are handled. No need to adjust from the defaults unless you want to!
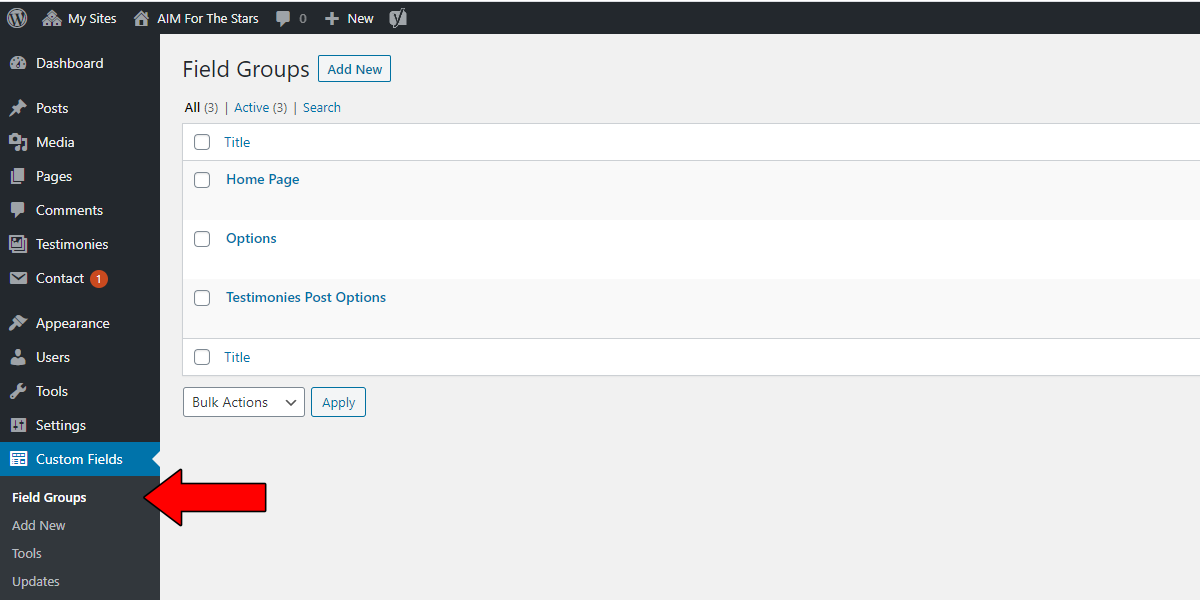
- Custom Fields. You likely will not need to edit or add to this feature, as we have set up defaults for you already!
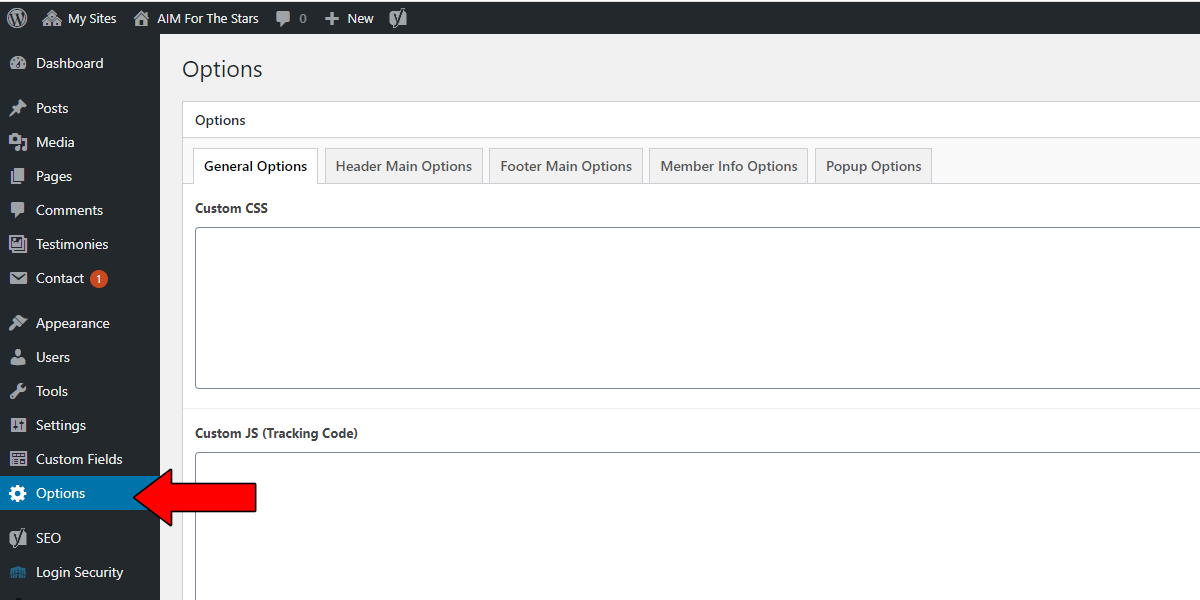
- Options. Here is where you’ll need to make most of your adjustments. You’ll be able to add custom CSS, custom javascript (tracking codes, for example), change your email or phone number, and make other adjustments. Don’t worry! We’ll get into this in more detail below.
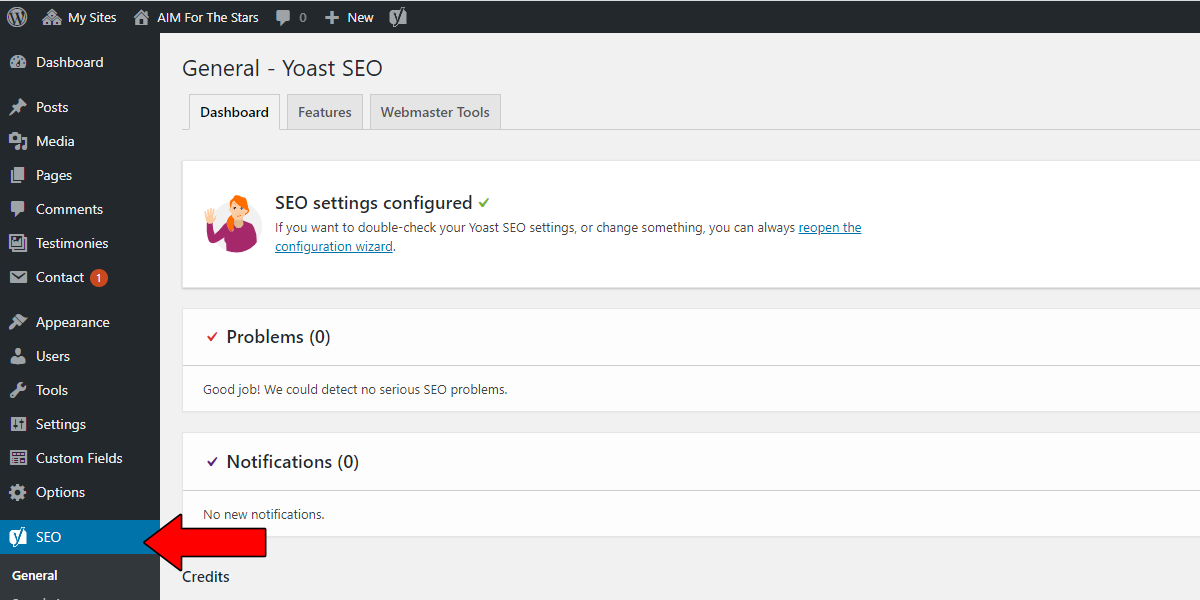
- SEO. You probably won’t need to edit this section, either. SEO-savvy users may wish to make adjustments. The SEO for your MyAIMStore is powered by Yoast, which has complete documentation available here.
Customizing Your Site’s Appearance
MyAIMStore’s Customize page is where you can make visual changes big and small to your website. You can get here by clicking on Appearance from the left-side menu.
Once there, you will notice that Appearance is broken into menu options “Themes”, “Customize”, “Widgets”, “Menus”, “Header”, and “Background.”
Let’s go through these step-by-step.
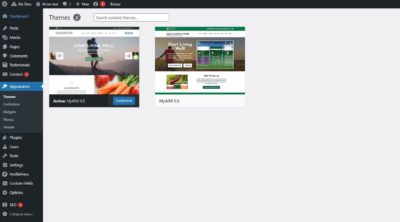
Themes
Here, you’ll find your MyAIM 4.0 theme pre-installed for you, but you won’t need to do anything here.
Customize
Now is where things start to get really fun! You’ll see in the image below that the Customize menu is broken into “Site Identity”, “Colors”, “Header Image”, “Background Image”, “Menus”, “Widgets”, and “Homepage Settings.” Click on any of these to see your options.
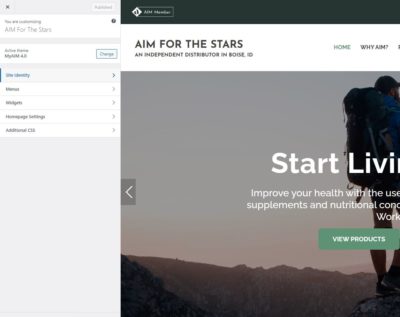
Here are the things you’ll be allowed to customize for your MyAIMStore!
To change the title of your MyAIMStore Site, click “Site Identity”, then edit the “Site Title” field shown and click “Publish” on the top right side of the edit menu, as shown below. You won’t be able to adjust anything else on this page.
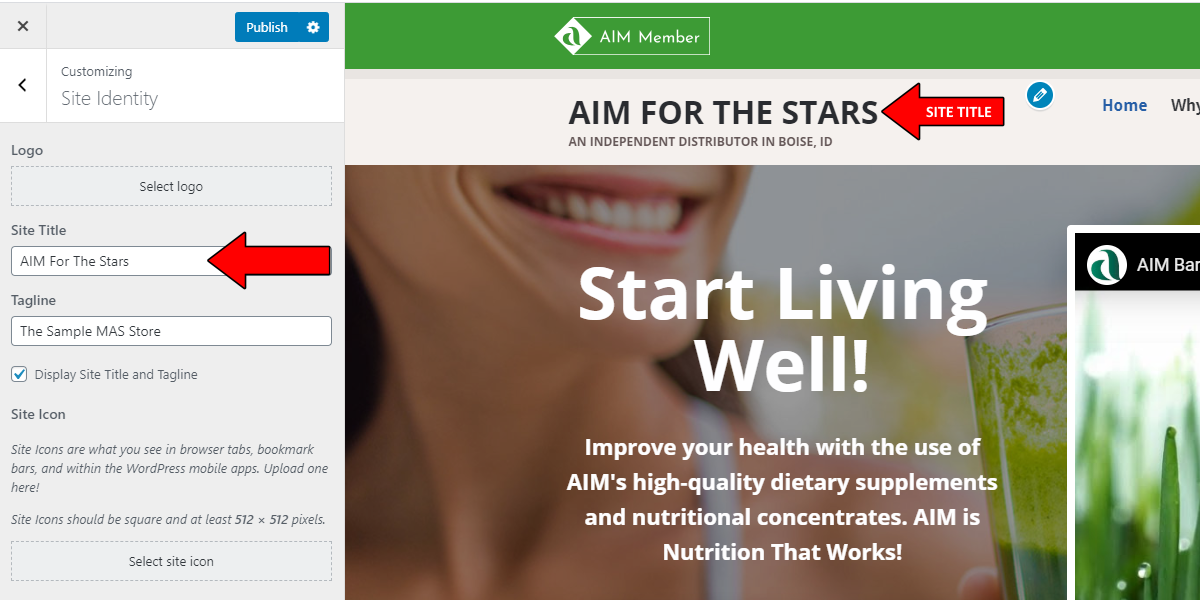
Changing your site title. Click to expand.
To change the background image of your MyAIMStore, click “Background Image” from the “Customize” option, and click “add an image” to change your background. In the below image, you can see that I’ve added a large image of a coffee cup, and what it looks like as a repeated background on my page, behind the content. If you’re going to add a background images, small and seamless background tiles work best for this, or, if using a larger image, set it not to repeat. Be sure the images you choose are either your own, or approved for public use by their creators.
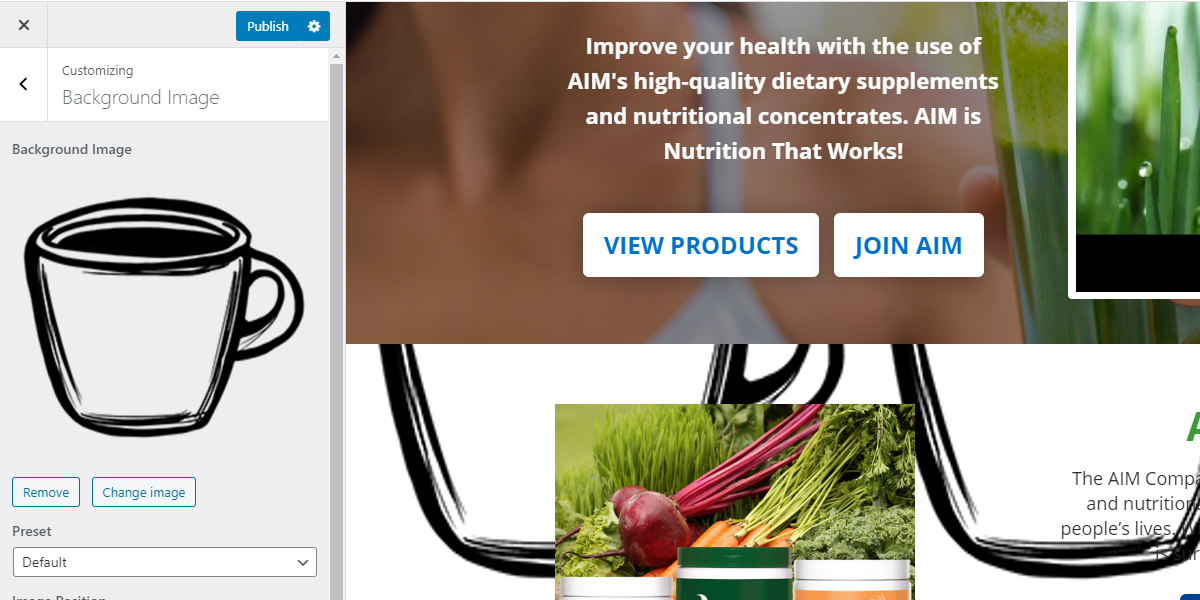
Changing your background image. Click to expand.
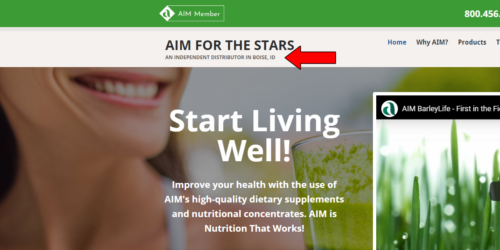
To adjust your main menu, which appears at the top of your MyAIMStore site, click on “Menus” from the “Customize” option, then on “Main Menu.” In the below image, you can see where on the site your Main Menu appears, and how it’s structured on the left side. Drag and drop to re-order, add items or pages, or change the item descriptions.
Where the secondary menu under “Testimonials” is indented in the left menu, that indicates that it’s a submenu. Note in the image below that it appears when you hover over “Testimonials”, its parent menu item. Any of the parent items can contain sub-menus if you choose.
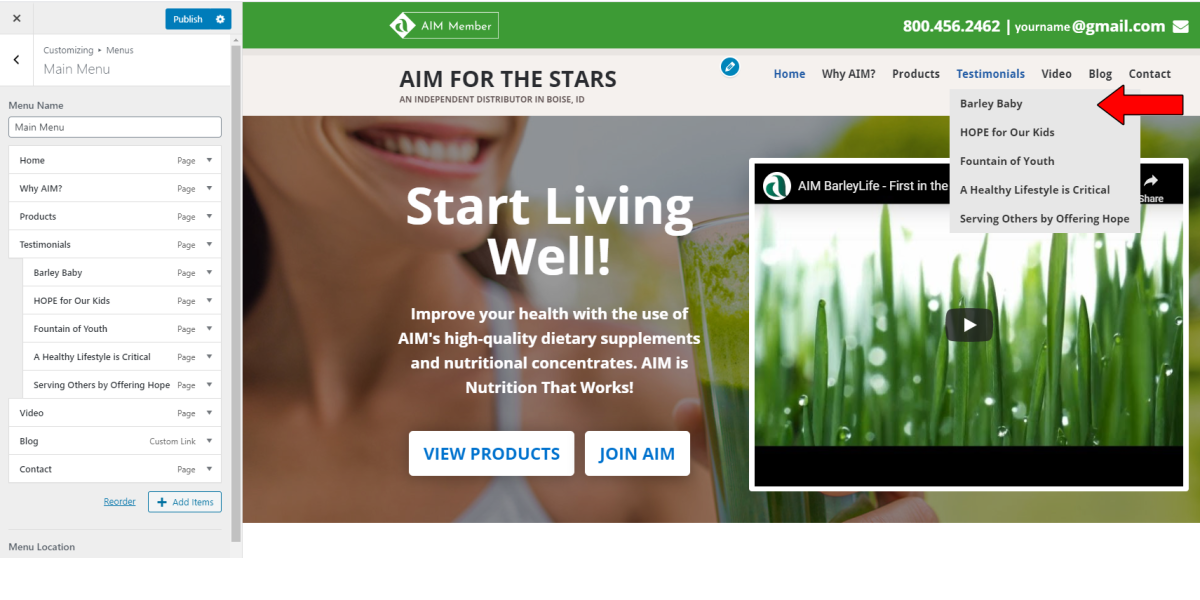
How to edit your main menu. Click to expand.
Some of the pages on your MyAIMStore site will have widget areas, such as a sidebar. In the image below, I have navigated to the “Blog” page in the Main Menu of the site, where a sidebar is displayed. In the left-hand menu, you can see the items which appear in the sidebar. These are called “widgets.” You can add, remove, or re-order the items in your sidebar here.
To see which other pages have widget areas, simply navigate to them while in this area of the Customize menu.
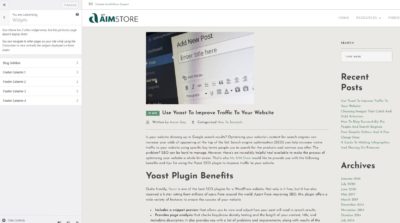
Editing widget areas. Click to expand.
Customizing Your Site’s Settings
MyAIMStore’s Settings page is where you can make preference changes to your website. You can get here by clicking on “Settings” from the left-side menu.
Once there, you will notice that Settings are broken into menu options “General”, “Writing”, “Reading”, “Discussion”, “Media”, “Permalinks”, and “Akismet Anti-Spam.”
Let’s go through these step-by-step.

The Settings page. Click to expand.
Under General settings, you’ll be able to change your MyAIMStore site’s title, admin email address, language, time zone, and preferred date/time formats.
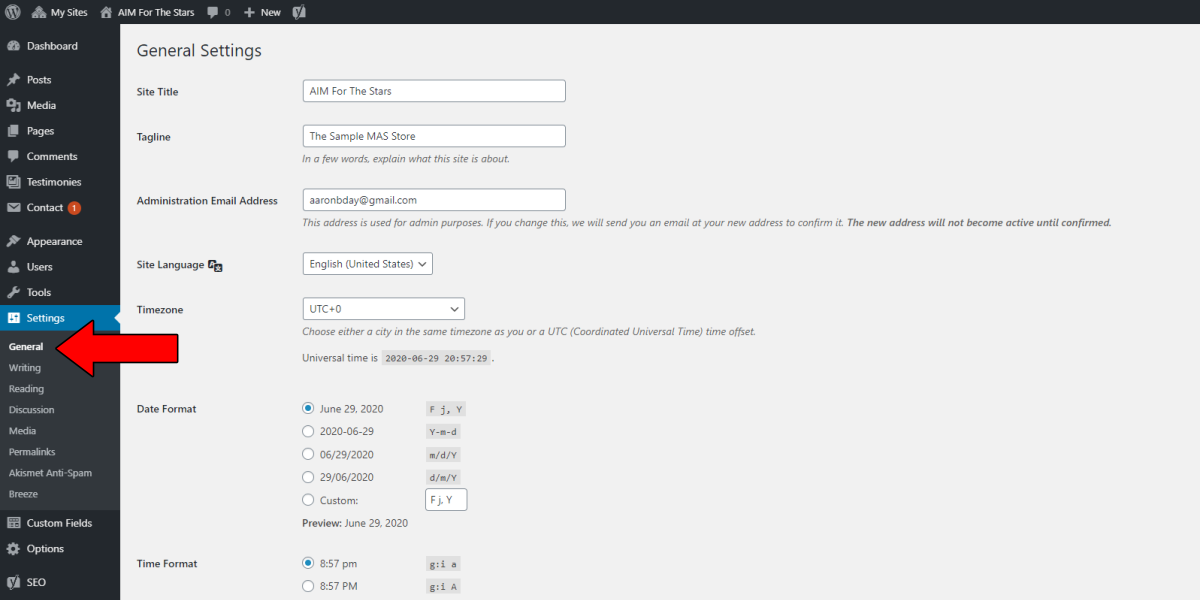
General settings. Click to expand.
Under the Writing settings, you will be able to choose a few formatting preferences, as well as your default post category and format.
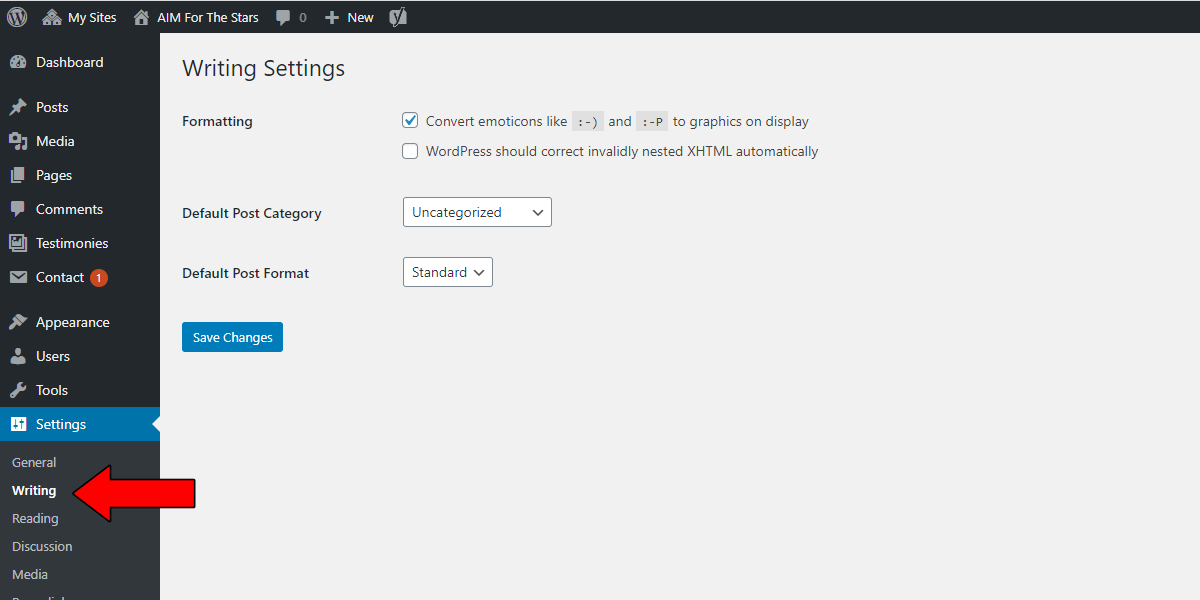
Writing settings. Click to expand.
We recommend you leave this section as-is.
Under the Discussion settings, you will be able to choose some preference with regard to how comments on your posts and pages are handled, and how you are notified. Some default settings have been selected for you.
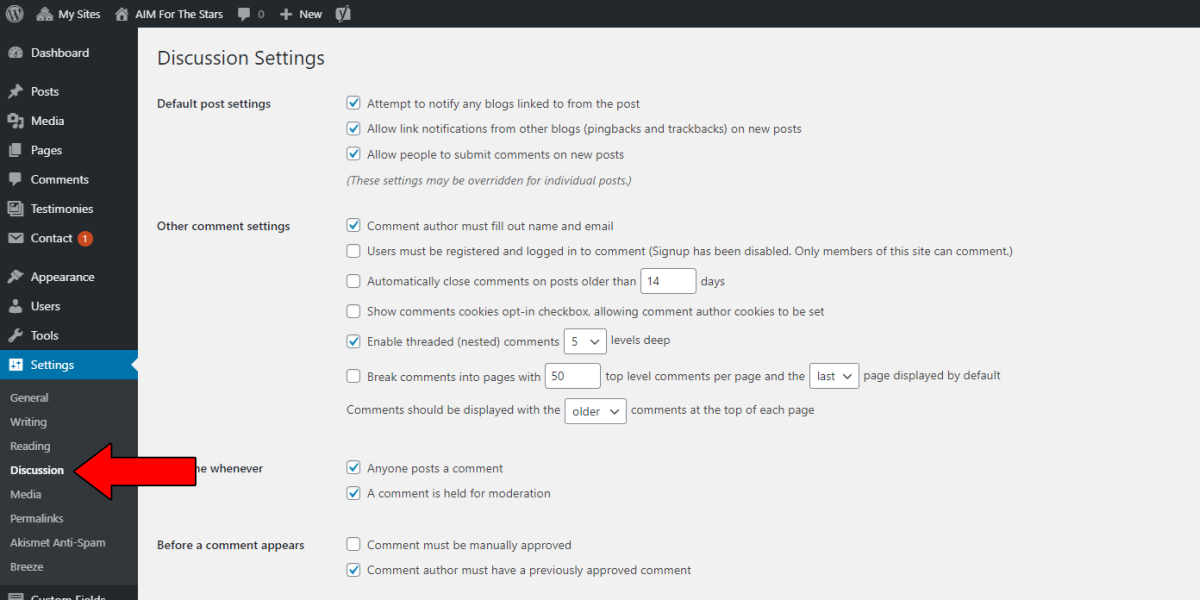
Discussion settings. Click to expand.
We recommend you leave this section as-is.
Don’t touch this part!
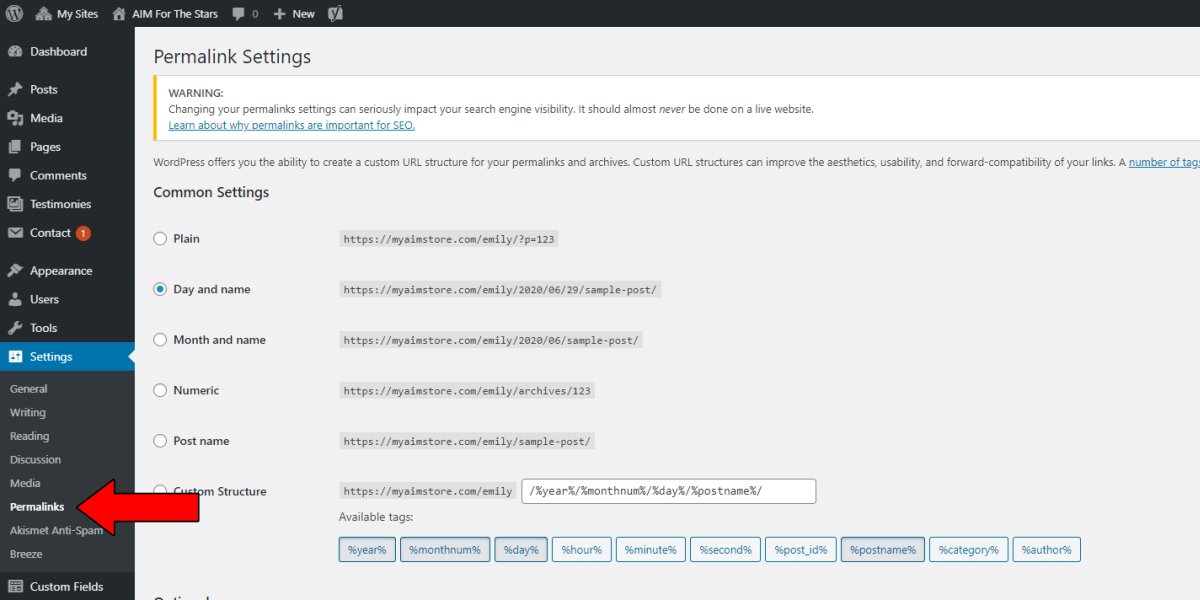
Permalinks settings. Click to expand.
If your site is being inundated by SPAM, you can visit the Akismet page under Settings and follow the prompts to set up your Akismet account and attach it to your MyAIM Store.
Customizing Your Site’s Options
MyAIMStore’s Options page is where you can make optional changes to your website. You can get here by clicking on “Options” from the left-side menu.
Once there, you will notice that the page is broken into tabs for “General Options”, “Header Main Options”, “Footer Main Options”, “Member Info Options”, and “Popup Options.”
Let’s go through these step-by-step.
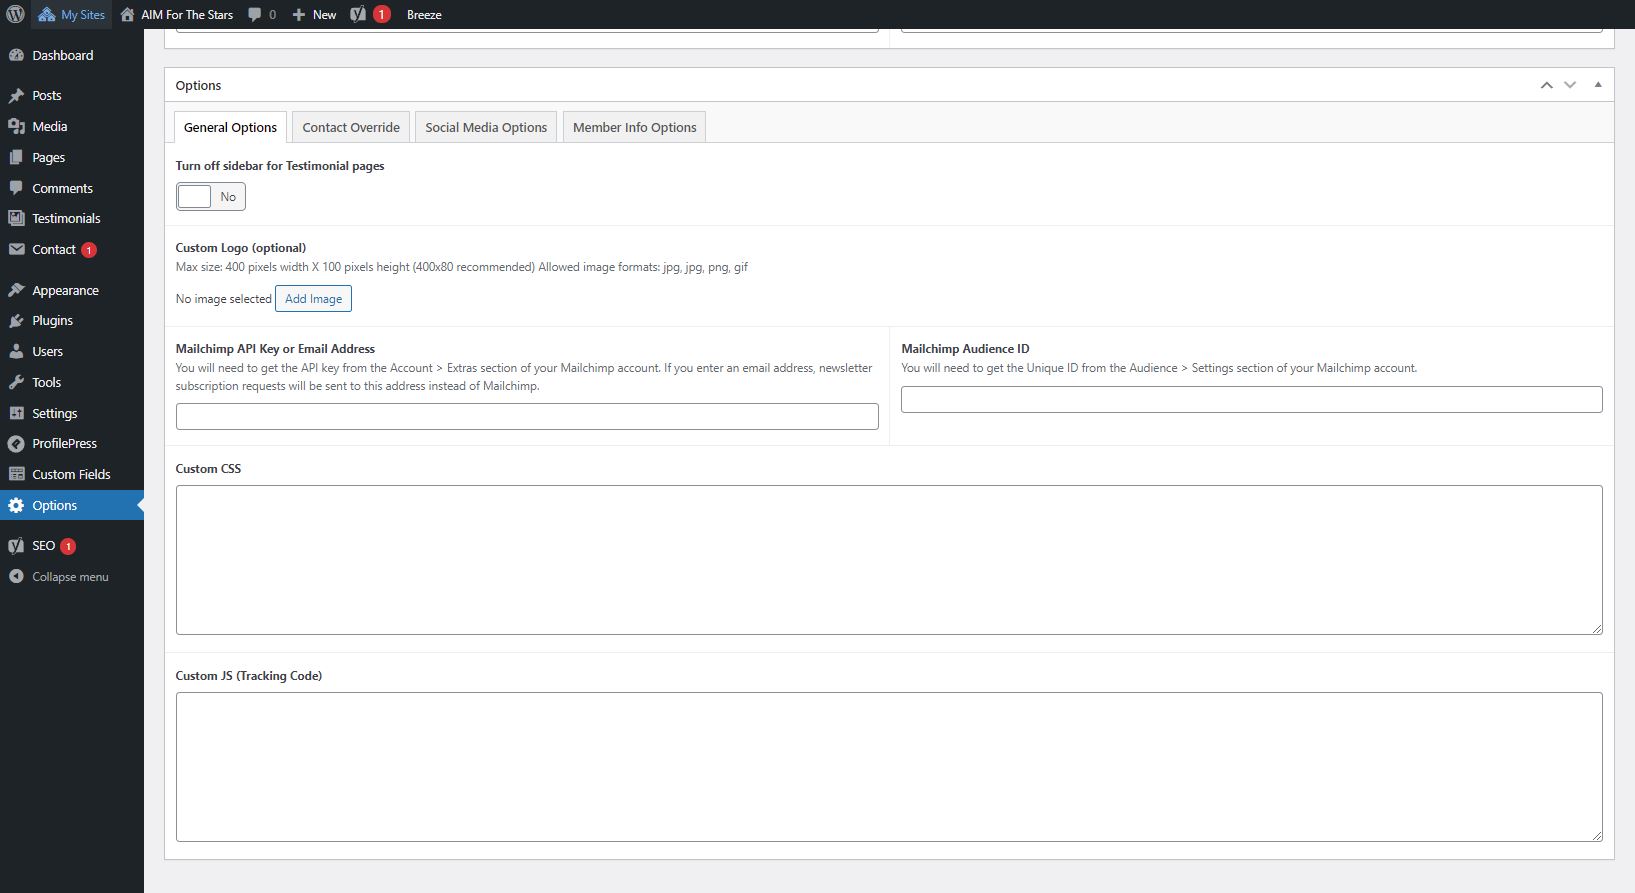
On the “General Options” tab is where you can add custom CSS or custom Javascript, such as a tracking code from Google or another service. Simply enter your custom code into the appropriate box and click “Save Changes” at the bottom of the page.
General options. Click to expand
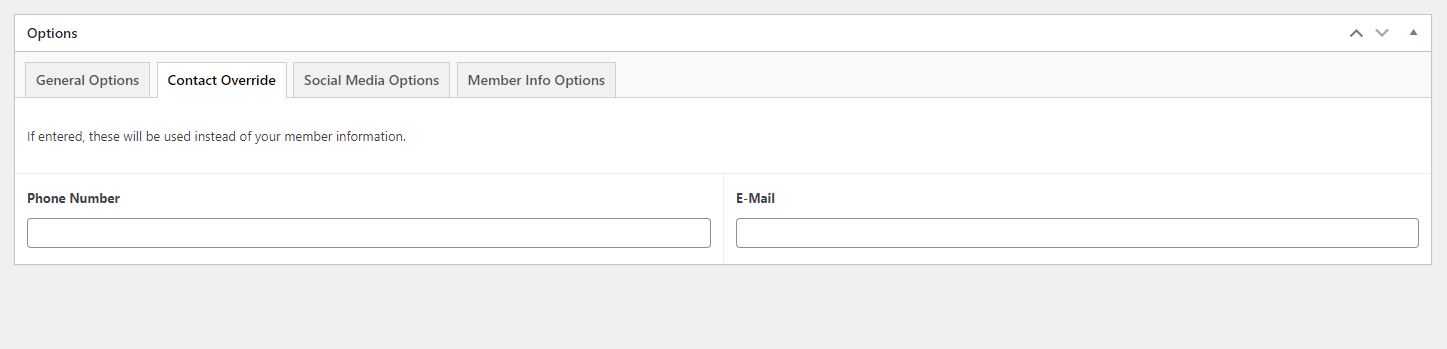
Here, you can set your public facing phone number and email address to something other than what is associated with your Member ID under the Member Info Options tab.
Contact Override. Click to expand.
On the “Social Media Options” tab, you will be able to list your social media accounts for display on the contact page, as well as clickable icon links in the footer of the site. You’ll retrieve your profile URL by visiting your profile in a browser and copying the URL.
Social Media URLs. Click to expand.
Find your social media URL here. Click to expand.
On the “Member Info Options” tab, you will be able to enter or edit your personal information. Do not change the Member ID Number!
Was your question not answered above? Try our
How-To, FAQ & Troubleshooting
How do I change my contact information?
How do I change my location?
How do I change my site name?
How do I change the main menu?

Main menu indicated. Click to expand.
To change your main menu,
- In the left menu, click “Appearance”, then click “Menus.”
- At the top of this page, under the “Edit Menus” tab, make sure that Main Menu (Primary) is selected. You’ll see the menu structure on the right.
- You can change the order of the menu items by dragging and dropping the menu items up or down, or by indenting. Make sure to click on the Save Menu button to save your changes.
- To add a new menu item, either select a page from the left or enter a link under Custom Links. When you add to the menu, it will add to the bottom of the menu structure. You will need to drag it to your desired location.
Note: If your main menu isn’t displaying correctly, make sure that “Primary” is checked under Menu Settings in this section.
How do I update the home page slide area? (Hero Section)
- From the left menu, click “Pages.” Then, find the page labeled “Home” and click “edit.”
- Update the content as desired and then click on the “Update” button on the top right of the page.
- To update the background image slide, make sure that you use an image which is at least 1280px wide. Also, however, make sure that the image isn’t TOO large, as that can cause your site to load slowly. See our notes on images below.
- Large Text: This is the title in the slider section. Try to keep it short.
- Content: This is the text under the title.
- Button Text & Button URL: These are for the left button. You can’t update the right button (“Join Now.”)

Home Slider area. Click to expand.
How do I update the home page product section?
- From the left menu, click “Pages.” Then, find the page labeled “Home” and click “Edit.”
- Scroll down to the “home page” section and find the “Intro Block.”
- Update the content and options in this section as needed and then click the “Update” button on the top right.
- Enable Section: Changing this to “No” will hide the entire section from your site.
- Intro image: This is the image on the left. Click to remove and then replace if desired.
- Intro Title, Text, Button Text, and Button URL: Update these to change the text and button on the right.

Products area. Click to expand.
How do I update the home page about section?
- From the left menu, click “Pages.” Then, find the page labeled “Home” and click “Edit.”
- Scroll down to the “home page” section and find the “About Block.”
- Update the content and options in this section as desired and then click on the Update button on the top right to save your changes.
- About AIM: This will be the title on the right.
- About Text: This will be the text block under the title.
- Testimonials Title: This is the main title on the top of the section.
- Testimonials Content: This will show testimonials from the Testimonials section of the site dashboard. Or, if you leave this field blank, you can show an automatic carousel of testimonials with the button.
- Testimonials Button URL: Will only display if the Testimonials Content is blank. All the testimonials found in the Testimonies section (found in the left menu) will rotate through in this section.
- Update testimonies as desired, adding new ones as you get them and removing others as desired.

About section. Click to expand.
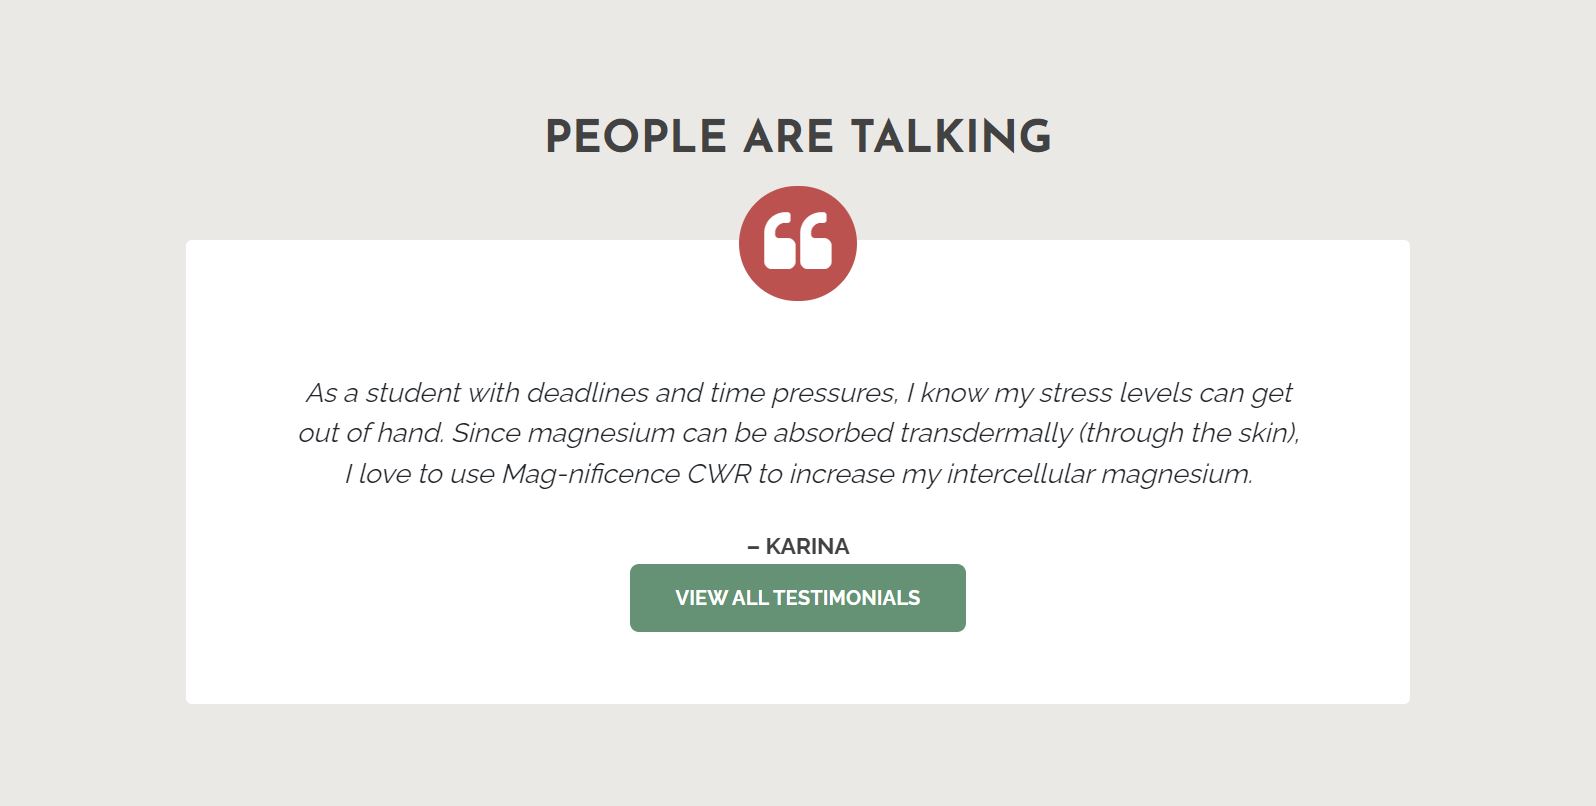
Testimonials section. Click to expand.
How do I update the blog section title?
- From the left menu, click “Pages.” Then, find the page labeled “Home” and click “Edit.”
- Scroll down to the “home page” section and find the “Home Updates” block.
- On the right, if you have any blog posts, those posts will be displayed; most recent first. If you haven’t added any posts (click “Posts” in the main left menu to add), the blog posts from our BarleyLife Blog will be displayed.
- Update the Title and page to link to as needed.

How do I update the call to action?
- From the left menu, click “Pages.” Then, find the page labeled “Home” and click “Edit.”
- Scroll down to the “home page” section and find the “Call to Action” block.
- To update the top title, enter the desired text in the “Heading” field.
- To update the content below, entire desired text in the “Content” field.

Call to action section. Click to expand.
How do I update the Sign Up section?
- From the left menu, click “Pages.” Then, find the page labeled “Home” and click “Edit.”
- Scroll down to the “home page” section and find the “Sign Up ” block.
- To update the top title, enter the desired text in the “Heading” field.
- To update the content below, entire desired text in the “Content” field.

Signup section. Click to expand.
How do I update the Video section?
Understanding Advanced Options & Settings
Widgets
MyAIMStores include a number of custom widgets which you can add to the sidebars of the pages which contain them. To view the available widgets, go to Appearance in the left menu, then click “Widgets.”
To add a widget to one of your sidebars, simply drag, then edit and save. Drag up or down to reorder.
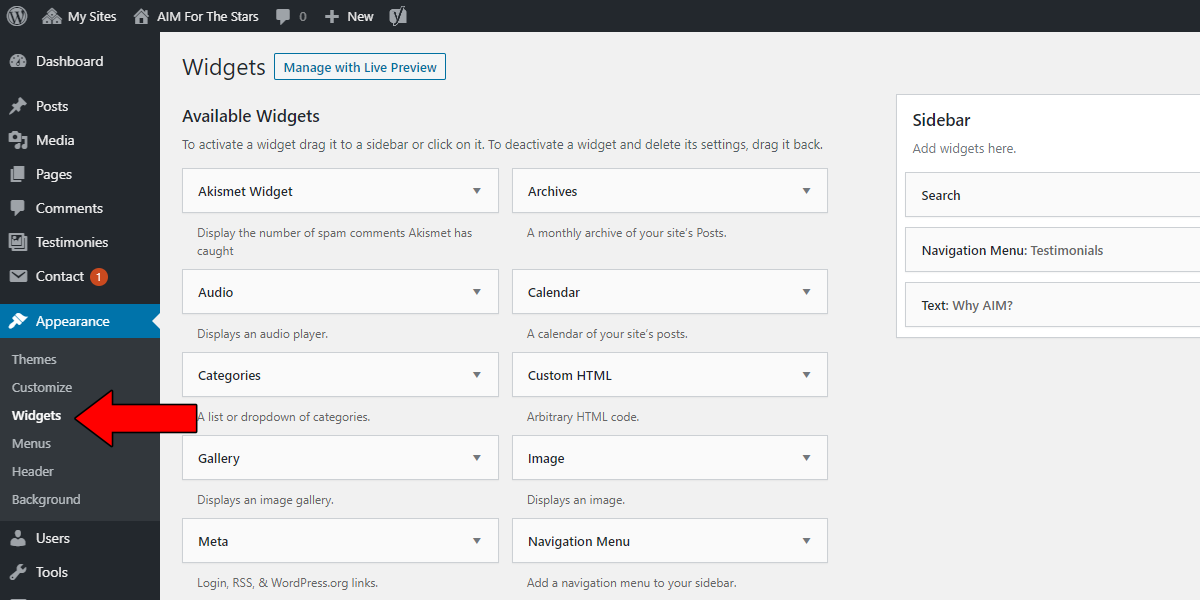
Widgets area. Click to expand.
Page Templates
Custom Page Template List
Your MyAIMStore comes bundled with unique page templates for loads of additional content on your MyAIMStore websites. Below is a list of the currently available page templates.
- Default – Displays all categories, monthly archives, popular tags and the 30 latest posts (for bloggers mostly)
- About – An overview of The AIM Companies, including the popular Who Is AIM video
- Contact – A page with a contact form on it so that a web visitor can email you. All correspondence will go to the e-mail address you have on file with MyAIMStore
- Full Width – A full width page template without the sidebar.
- Home Page –
- Products – A portfolio of six of AIM’s super concentrates with affiliate links to the AIM product store.
- Testimonial – Splash page with testimony snippets from several AIM Members
- Testimonial – A Lifestyle You Love – One member’s story of relieving her multiple sclerosis symptoms, thanks to AIM products.
- Testimonial – Barley Baby – AIM Director Tanya van der Westhuizen’s story of how AIM products transformed her health and her second pregnancy.
- Testimonial – Daniel Matthews – AIM Group Builder Daniel Matthews’ story of how AIM products have changed his family’s life.
- Testimonial – Doctor’s Orders – Dr. Yu-Shiaw Chen’s discovery of the antioxidant benefits of green barley.
- Testimonial – Emily Layton – AIM Director Emily Layton’s story of how AIM’s plant-based products changed her daughter’s health for the better.
- Testimonial – Fountain of Youth – Kathie Fitzpatrick’s story of looking younger and living better, thanks to AIM products.
- Testimonial – Helene McKoy – AIM Member Helene McKoy explains how she has incorporated AIM products into her healthy lifestyle.
- Testimonial – Hope for Our Kids – Olympic speedwalker Debbi Lawrence on how AIM products helped her race with the best
- Testimonial – Lora Wishart– AIM Group Builder Lora Wishart’s story of how AIM products help her make a difference in the classroom..
- Testimonial – Serving Others – AIM Director Char Pelfrey’s story about how changing her nutrition helped her reclaim her health.
- Video – A collection of four popular AIM YouTube videos, already embedded straight onto the page. No coding necessary!
Some of these are already published and ready for use. Others, such as the testimonials, you can publish as-is in order to use. Simply go to “Pages” in the left menu and click “Add New.” Enter a title. On the right, select your desired template, and your desired parent page. For example, a testimonial’s parent page might be “testimonials.” A new standalone page you’re creating might not have a parent page.
Then, just click “Publish.” No more to be done!
For the non-testimonial templates, you will need to add your desired content before publishing.
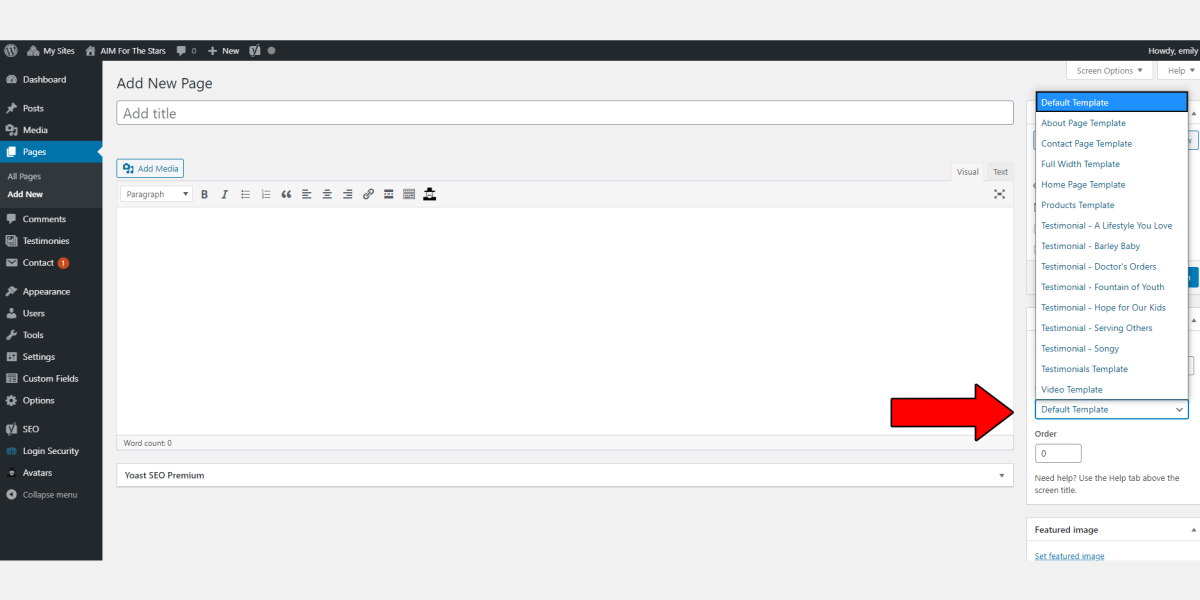
How to select a page template when creating a new page. Click to expand.
Setting Up Page Templates Step-by-Step
Here’s a quick synopsis of how to set up a page template on your MyAIMStore site.
- Go to Pages -> Add New in the left-side menu.
- Simply fill in the page title, which can be anything, and then ignore the page body content.
- Scroll down to the “Template” field in the “Page Attributes” box and select the page template you’d like to use.
- And publish!
Adding an external URL to your page navigation menu
- On the left-side menu, click on “Appearance”, then click on “Menus.”
- Under “Add Menu Items”, select “Custom Links.”
- Add the external URL and link text in the proper fields, and click “Add to Menu.”
- On the “Menu Structure” option, drag your new item to its desired location.
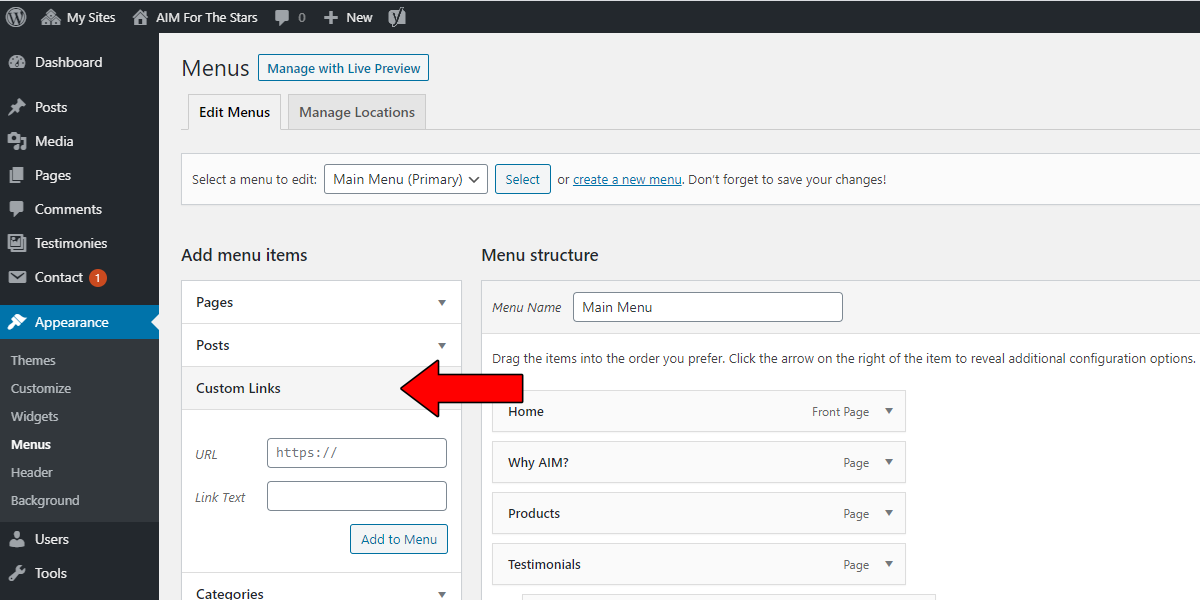
Adding an external URL to the menu. Click to expand.
Understanding SEO
SEO stands for Search Engine Optimization, and Search Engine Optimization stands for Make Google Recognize Me. MyAIMStore websites have built-in SEO powers that are designed to give you an edge over the sea of nutrition voices crowding the web. This out- of-the-box functionality will have your site optimized for Google, and other search engine results with a few clicks, helping you climb the rankings for keywords you want to be registered under.
SEO is by no means an easy skill to master, but getting the basics right is a great start to attracting healthy traffic to your website.
To get to the MyAIMStore SEO section, select “SEO” from the left-side menu. You will find that your settings are already configured, but that you can add search engine verification codes (SEO -> General -> Webmaster Tools), customize your search appearance, and more.
One section you may wish to fill out is for your MyAIMStore’s social media accounts. To do this, visit (SEO -> Social) and fill in any URLs you wish.
Understanding Meta Information
Meta information on your site helps search engines crawl and index your site. It also helps with adding value to your pages, resulting in better rankings in search engines. Typical meta tags, for example, get added to the head of your site serving many purposes.
Archive Indexing
Any MyAIMStore site can have several archives to find/categorize posts. Be it by category, date, tags, search, etc.; all get indexed by search engines. This can create issues as search engines are forced to index pages containing the same data, thus diluting the overall value of keywords.
By default we have set the Archive indexing to the “category archives” so to focus in on more valuable sections of your site, in other words, telling search engines only to index the selected archives.
You can modify the meta description of your MyAIMStore site by visiting “SEO” in the left menu, and clicking on “Search Appearance.” Click on the “Content Types” tab, and scroll down to the text box which reads “Meta description.” Try to keep your description brief – Google and other search engines tend to truncate to the first 155-160 characters. Click “Save Changes” at the bottom of the page. Repeat for all three sections on this tab – Posts, Pages, Testimonies.
Keyword Meta
Keywords are what a user searching on Google or another search engine types in, in order to hopefully find your site in the results. Because of this, you’ll want to install keywords on your individual pages and blog posts, and your home page, to boost their signal in the search engine results pages (SERPs.)
Adding Meta Information and SEO to your Pages and Posts
To add keywords to your individual pages or posts, open the page or post for editing, then scroll down to the “Yoast SEO Premium” section and click to expand it.
Google will automatically try to find a relevant snippet of content inside your page to display, but if you want to help it out, you’ll want to fill out a few of these SEO fields.
On the SEO tab, start with a focus keyphrase.
The focus keyphrase is the phrase that you want your post or page to be found for in search engines. Sometimes, it is a single word, but it usually consists of a few words. That’s why we call it a keyphrase. For example, if you want your blog post to rank for ‘healthy snacks’, then optimize your post for that term. Your focus keyphrase can also be longer. For instance, you could write an article about healthy snacks specifically made for kids and optimize for ‘healthy snacks for kids’. Or a post about healthy snacks to eat after a workout, and optimize for ‘healthy snacks after workout’.
Next, there is a “Google preview” section. If you want to edit what Google displays for your page, click “edit snippet.” Enter a short meta description for your page’s content.
Next, you can add keyphrase synonyms, if you have any. For example, if your focus keyphrase is “healthy snacks”, a keyphrase synonym might be “nutritious snacks.”
Next, you can add a related keyphrase if you like. For the rest of the SEO tab, your default values should be good.
On the “Readability” tab, you can see your score – it’s ranking the content for readability by search engines. If you have a low score, consider editing the content of your page for clarity.
On the “Social” tab, you can see a preview of what your page will look like when shared on Facebook or Twitter. If you don’t like how your preview looks, adjust it here as desired, pull in a custom picture, edit descriptions, and more.
Additional information
MyAIMStore websites are built on the WordPress platform. If you need extra help, I would suggest checking the WordPress Codex. And, you can always e-mail MyAIMStore with thoughts and questions.